


How to install drop-in ceiling tiles?
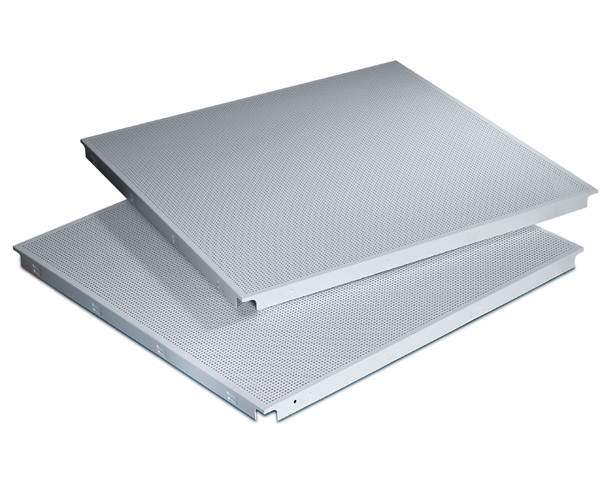
This is what the installed drop-in ceiling looks like. It has the same pattern area as our surface mount ceiling tiles, but with flat edges and bevels that can be embedded in a grid system.
What follows is a step-by-step guide for installation:
1. Use a laser level or a chalk box to determine, the correct height of the ceiling.
2. Fix the corner piece to the wall with screws. Make sure the screws are long enough to go through the wall and into the studs.
3. Hang the suspension wire on the ceiling. Hanging wires are typically spaced 48 inches through the ceiling. Also, they should be at least a foot below ceiling height.
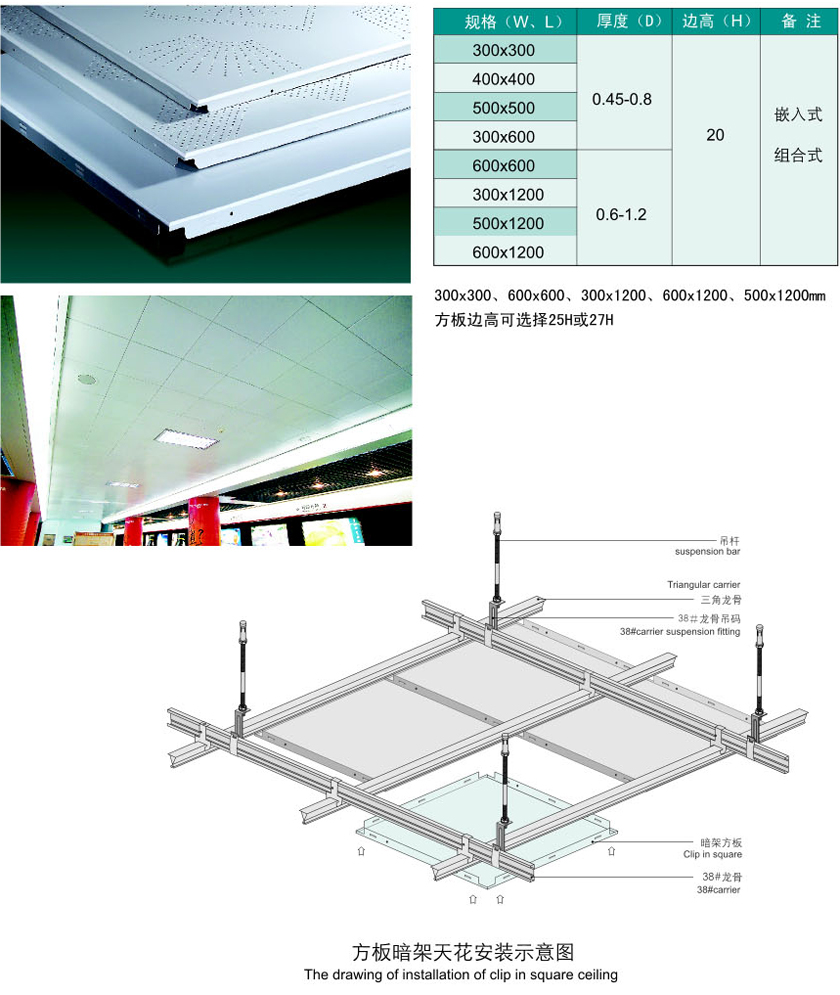
4. Hang the main runners of the metal grid using the hanger wires to tie the grid in place. The main runners will run from one side of the wall to the other. You’ll need to snap them into the trimming that runs along the wall. The runners will have ore-drilled holes that the grid hangers will slip through and tie. The direction of the main runners should run at right angles to the joist when installed. To make sure that the metal runners are level, use a laser to site the grid, or stretch out a string from the wall trim to the opposite wall trim.
5. Install the cross tee between the main runners and hold it in place using the tab on the end of the cross tee that engages the slot in the runner. Typical ceiling tiles will be 2*2 feet or 2*4 feet.
6. Drop the ceiling tiles in the grid flanges. If needed, secure the tiles with hold-down clips. Do not place hold down clips on tiles that may need to be lifted for access in the future.


 Email
Email MR tan
 Mr Tan